
When completing our project, which include planning and research as well as our final products, we have used a range of technologies. These technologies ranged from physical forms such as cameras and lighting to digital technologies such as the internet to help us do this. Each technology has a unique function, which is why we used a range when creating our final products as well as completing other stages in our project.

apple mac
|
Infinity Pictures had been assigned with Mac 1 to complete our project. Since we have previously used Macs (during AS Media) we were familiar with the different programs and features. Throughout all stages of our coursework: development, pre-production and production of our final products, we have continuously used a Mac since it offers a range of programs that have aided us such as:
As well as the programs used being of help to us, the Mac itself was easy to use and allowed us to work on multiple things at once. Other features include:
|

|


WEEBLY

Weebly is a website builder in which allowed us to make the website to present the work that we have done throughout the year. We were easily able to make our website engaging and express our creativeness throughout the use of GIF's and images on our website. Since we had each individually made a website during AS Media, we were familiar with the features of Weebly.
dashboard
The dashboard is a main overview of our website: how many people have been looking at our page and the name of our website. It also informs us of any new features that have been introduced.
|
drop down menu
In order to make it easier for our audience to navigate around our website, we added a range of drop down menus. This making it quicker to go to a specific page and making our website look more professional.
|
elements
|
On the left hand side of our website there are several different elements that can be used to edit our website and add more information. This made it easy for us to add YouTube videos, pictures and text as well as making it able for us to customize our work. By using elements such as dividers and spacers, we were able to organize our work in a way which would be easy to read.
All of these different elements allowed us to present our work in a range of different formats. This making it eye-catching and unique so that it would catch the attention of the reader. |

|
usb
|
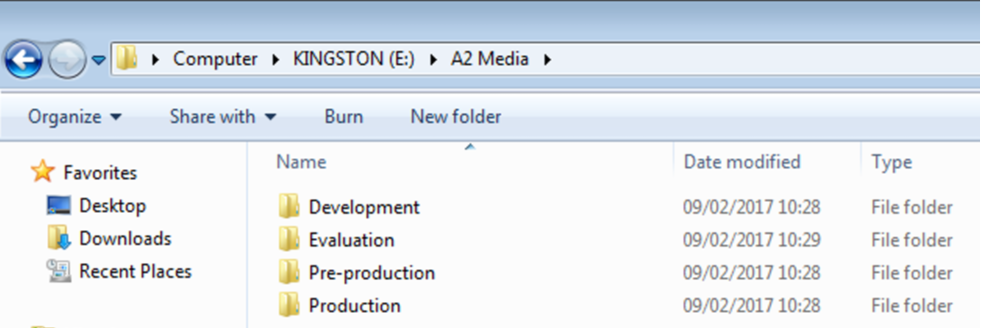
A USB is a portable storage device in which allowed us to save work in a place that would be safe and secure. It also meant that we were able to do work in college, which we could then finish at home. Since they have a huge storage space: 32GB or 64GB, it meant that we could save important files such as our final pieces on them. We also organised our work into the different stages for our media coursework which would mean a more efficient way in finding our work as well as making sure that we have saved our work in the right place.
|

|
|

|

|
Google was the search engine that we used to help us carry out research into the horror genre. It also helped us gain inspiration from various media texts such as trailers and magazines relating to the horror genre. When creating our website, we used Google to search for a range of different GIF's and images to make our website stand out.
We also used Google to access various websites such as YouTube, IMDb and Wikipedia. This is because it would be a quicker and more efficient way of finding the resources that we needed. |

|

|
IMBD
|
IMDb (Internet Movie Database) is a website that allows people to find out information regarding certain actors and films. It's a reliable source of information because it gives in-depth information about the synopsis, cast, crew and the technical specifications. IMDb was helpful when creating our own synopsis for Uploaded since we could easily gain inspiration from real media texts.
|

|

|

|
NETFLIX
Netflix is a worldwide entertainment company in which regularly uploads films and shows that are very different and unique since they range in genre. Since Netflix has been very popular, there is a website and an app that can be accessed from anywhere in the world. During the summer and throughout our the different stages we watched a range of horror films to give us inspiration. By doing this we could see the different conventions, such as costume and lighting, that are commonly used. This is because it would make our final products more successful as they would be easily recognisable as belonging to the horror genre.

|

|
wikipedia

|
Wikipedia is a free encyclopedia in which is constantly being updated since users are able to change the information on the website. Even though this can be reliable in some cases, there are a range of other websites that the information found on Wikipedia can be compared to.
When researching different horror films for our textual analyses, we used Wikipedia since it gave us in-depth information that we could easily condense. Additionally, the information we needed (such as the name of the director and the year the film was released) was easily discoverable. |

|

|
Powerpoint
|
In the development stage we used PowerPoint numerous times to present our work. When completing work on the horror genre Emily used PowerPoint to make a slideshow of the different theories of horror. When completing two concepts, Vanita created two presentations that were simple but effective in presenting information to the class.
PowerPoint is easily accessible and easy to use since there are templates readily available to use. Additionally, adding texts and images is simple since it only involves clicking one button that is labelled 'Add Text' or 'Add Picture'. |

|


wacom tablet

|
Wacom tablets allow the user to create different images and sketches electronically. These tablets are commonly used in graphics but were also used during the moodboard and artwork section of our coursework. Since James is a media and graphics student, he was able to borrow a tablet so that he could create some sketches regarding the protagonist's NVC (non-verbal communication).
This gave us a better idea of how the protagonist's would look during our trailer and allowed for us to experiment with different facial expressions. |

EPSON SCANNER
|
The scanner was continuously used throughout different aspects of our coursework: the horror genre, concepts and treatment as well as during print design. Different pieces of information were scanned in since when scanned in, they would be clearly visible and look more professional. Even though it was time-consuming, since each piece of paper would have to be individually scanned in, it was more efficient and easier to read.
|

|

This was part of our summer work: creating a treatment for our own film. It included the title, sub-genre and the target audience for our film.
|

This was a feedback sheet regarding what our class thought of our two concepts. It outlined the positives and areas for improvement.
|
youtube
|
|
YouTube was used throughout all stages of our coursework. It helped us gain inspiration for our own trailer since we watched a range of trailers for supernatural films. From this, we learned the different codes and conventions needed for our own trailer. Since we were using new technologies such as Adobe Premiere and Adobe After Effects, YouTube provided us with a range of tutorials. This helped us create the desired effect that we wanted for our trailer, poster and magazine front cover.
YouTube was also the platform used to upload videos such as team logs and the different SFX makeup techniques that we had experimented with. Additionally, YouTube was the platform in which we uploaded our trailer on, so we could gain feedback and see whether our project had been successful. |
|
|
|
|
photoshop
|
Photoshop was used mainly during our post-production stage but it was also used during our summer work as well as for nearly every stage during our coursework. James had used Photoshop to make the logo for our website and Vanita had used it to create digital drafts for our magazine and poster. Emily had used Photoshop to make moodboards for the different costumes that the characters in our trailer would wear.
Since we had used Photoshop before (in AS Media) we had all the relevant skills and knowledge to make our poster and magazine front cover. However, this year we were able to develop our skills further to make our work look more professional and look like a real media text. |

|

|

|
survey monkey

|
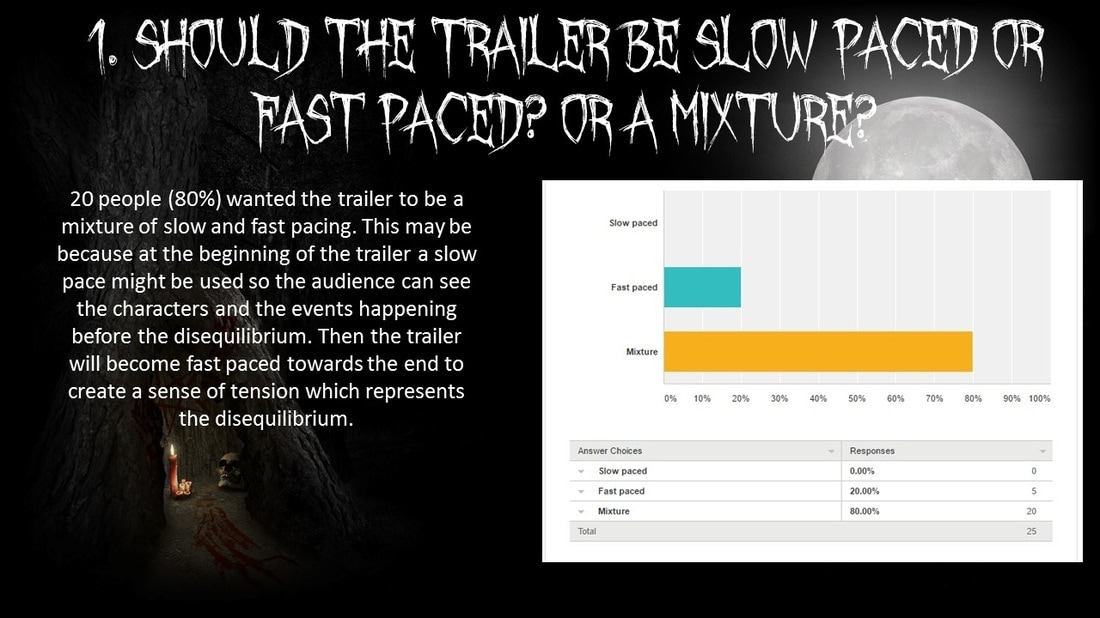
Survey Monkey was used during our audience research to gain feedback regarding what our target audience would like to see on our final products. Survey Monkey is a website in which allows the user to create surveys and then gain feedback in the form of bar charts and graphs.
Since the results were already made into bar charts and graphs, it was easy to then evaluate our findings. Survey Monkey was also very efficient to use since they have a mobile app, in which was used since it would notify us when someone had completed our survey. |
|

|
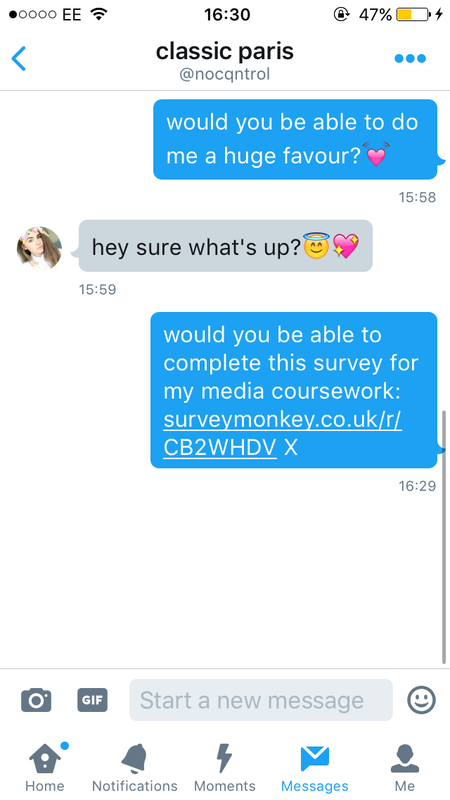
different social media platforms
When conducting our audience research we used a range of different social media platforms, which are listed below. These helped us connect and engage with our audience as well as gaining feedback regarding what our audience would want to see. Since we used a range of different social media platforms, they each had their own advantages and made it easy to gain feedback.
|
iMessage
|
Twitter
|
WhatsApp
|
Instagram
|
Facebook Messenger
|

|
|

|

|

|
adobe premiere
|
Abobe Premiere was used when creating an animatic for our trailer, in which we put the different shots that we had drawn (from our storyboard) on top of a template. This would show us the pace and timing of our trailer and give us a guide to work with.
Since this was our first time using Adobe Premiere, it meant that our skills were very basic and it took us a while to complete the animatic. We used tools such as the razor tool: cutting one clip into two clips and the selection tool: to select the different images that we wanted. |
|
|
|
|

CAMERAS

canon 600dThe 600D has a high resolution in which allowed us to film high quality footage for our trailer. It also has a lot of different filters in which allowed us to represent the change between the equilibrium and the disequilibrium. Additionally, the 600D had a range of different effects such as fish eye, soft focus and toy camera, in which allowed us to experiment with different shots that we could use for our trailer.
Features include:
|

canon 7dThe 7D also has a high resolution but what makes this camera useful is the flash. When filming shots in the dark, such as the antagonist crawling up the stairs, the flash was used to make sure that the shot was clear and visible. The 7D has 18 megapixel which was useful in filming close up and extreme close up shots of the protagonists (so that their NVC is clearly visible).
Features include:
|
photography
good pictures |
bad pictures |


|


|

|

|
|
We like these pictures since the bright lighting contrasts with the black back drop, which makes the individual and the props they are holding stand out. The shadow created by the lighting also gives the pictures an eerie effect.
|
We don't like these pictures since the lighting is too dark at the top of the image yet is too bright towards the bottom. In the second picture the antagonist's hand is not visible which makes the image look unprofessional and blurry.
|
equipment
tracking tubes
The tracking tubes allowed the tripod and the camera to be placed on top. This meaning that smooth shots can be filmed as well as the individual having control over the pace of the shot. When the protagonists leaving the car, tracking tubes were used to make sure that the shot was smooth.
shoulder rig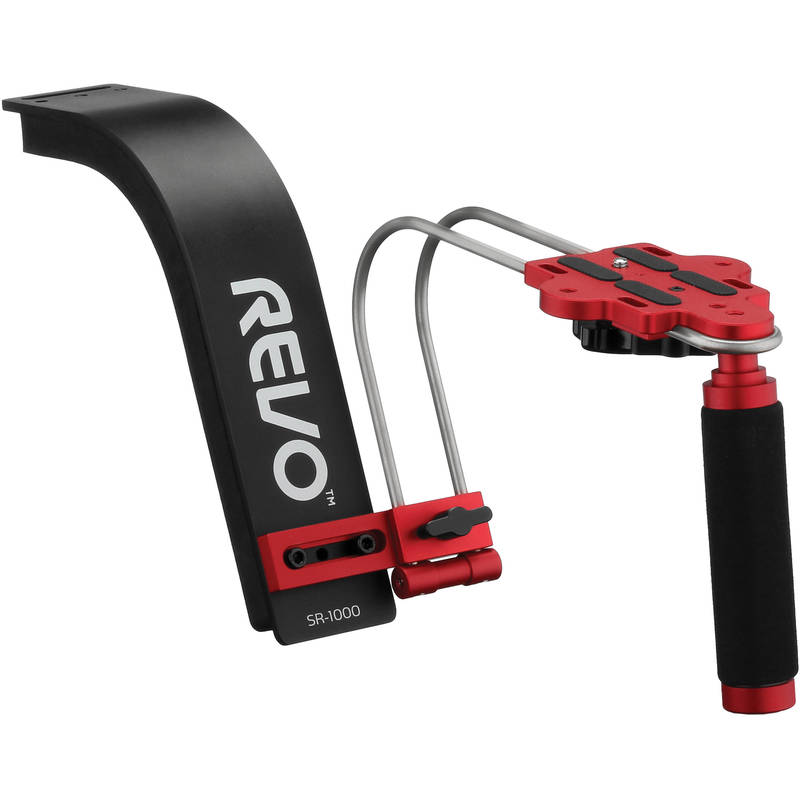
The shoulder rig was used to film shots that require a lot of movement. Using the shoulder rig means that shots are smooth since the person using it has a lot of control over it, rather than using the camera hand held.
kino flo lights
The kino flo lights were used for extra light, when the natural light wasn't available, which put the protagonist's and antagonist's into focus. Since we filmed the jump scare for our trailer on the stairs, we used the kino flo lights to maintain a professional and high quality shot.
|
tripod
The tripod was used mainly for taking pictures for our poster/magazine as well as for taking still shots for our trailer. By using a tripod, it meant that our shots were very still and not shaky. We were also able to adjust the height of the tripod meaning that we could film a variety of shots.
rode microphone
The rode microphone was used for all shots taken for our trailer. It's an extended accessory that is placed on the hot shoe of the camera (which is located at the top). When recording shots when the protagonists were speaking, it helped make their dialogue clear.
gorilla grip
The gorilla grip is useful since it can grip onto any material as well as being shaped into different positions. When filming a range of shots such as the antagonist crawling up the stairs and the computer malfunctioning, a gorilla grip was used since a tripod was too big and not useful. Since it's very small and lightweight it can be taken and used anywhere.
|
|
|
|
|

photoshop - magazine & poster

|
Photoshop was used to make our horror magazine and horror poster. Since we had already used Photoshop throughout A2 as well as during AS, we had knowledge of the different skills and tools needed. Since we had made our drafts: drawn, basic and intermediate, it gave us a guide to follow when creating our final products.
Since we had a good understanding of the different conventions of horror magazines and horror posters, we were able to follow and go against these conventions. This making our magazine and poster stand out since it would be unique and unconventional. |
MAGAZINE DRAFTS
magazine template: drawn drafts

|

|
magazine template: basic digital drafts

|

|

|
Magazine template: intermediate drafts

|

|

|
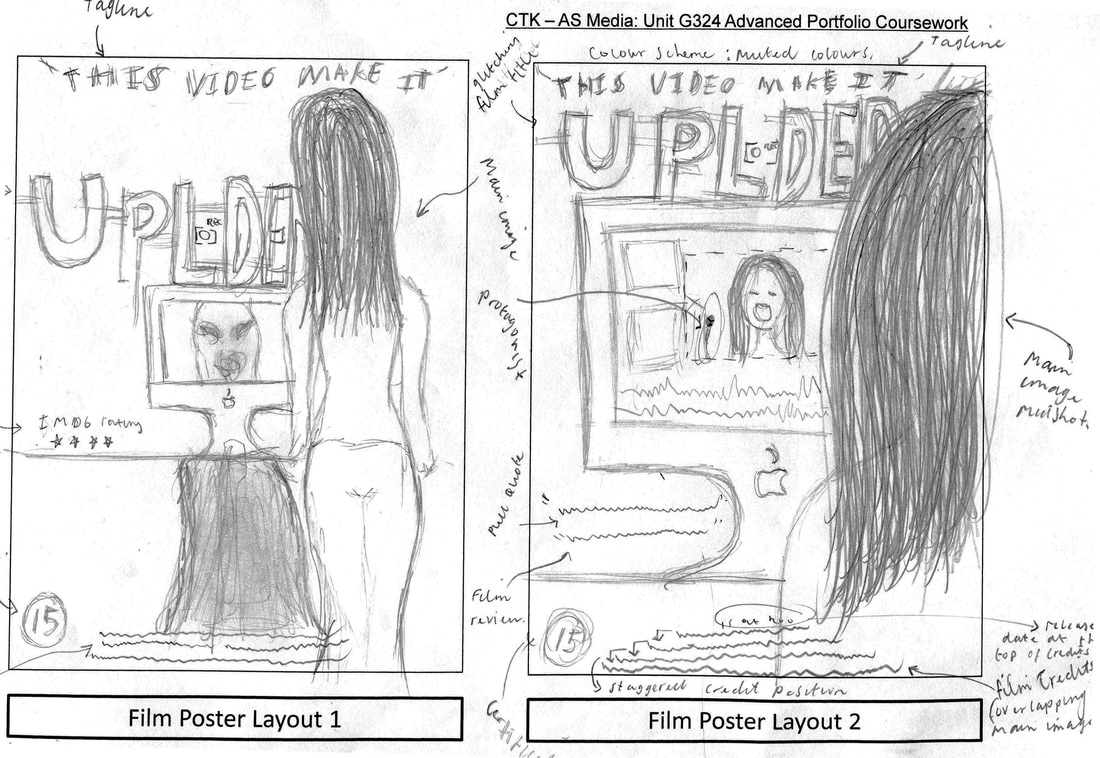
POSTER DRAFTS
Poster template: drawn drafts
|

|
magazine template: basic digital drafts

|

|

|
magazine template: intermediate drafts

|

|

|
POSTER CONSTRUCTION
This Poster is a culmination of multiple different creative decisions before reaching an outcome whichthe groupwas hapy with. This means that there where many different stages that had to be undergone, now you will be able to see.

poster development

Here was the first direction I was taking stylisticall however I wasnt too happy with what was becoming of it, so I moved it to the side & restarted the creation process.
|

Here you can see I took a more grungy & layered approach using a purple tint above it, at this point I only have one layer of imagery, I also have added he centering from the Cameras Heads Up Disply (HUD).
|

Here I have taken the primary image from the original design draft, I then overlayed it in the lower section of poster, I did this as I though it would look aesthetic, and it did. I also wanted to add the antagonist.
|

Here I have added the names of the artists participating within the trailer, I have also added film laurals the the film has attained. As well as slightly increasing the size of the of the antagonist on the page.
|
downloading fonts

magazine construction
This magazine went through a variety of different creative decisions before reaching the final outcome. This means that there where many different stages that had to be undergone, now you will be able to see.

magazine development

This first stage takes the normal base image which has night vision & the camera heads up display (HUD) & from there places it where it will stay on the magazine. I decided the tertiary colours will be red & white.
|

Here I have taken a base masthead & chosen black, however I think the black doesnt stand out too much, so I'm debating changing it to white, I also began to add mastheads. However I'm unsure with the placements.
|

In the lower section you can see I added thhe images and used a black & white colour scheme to make it consistent. I also changed the masthead to white & removed branch section because I thought it looked odd
|

You can also see I added the film title & a by-line. I also returned the placing of the coverline in the top right, this is because I decided it actuall looked visually aethetic, I also adde small details like social media icons, price & date.
|
downloading fonts

|
trailer construction
|
|
The software that we used to edit and construct our trailer was Adobe Premiere. The task of editing the trailer was done by Emily.
Even though we all had no prior knowledge of Adobe Premiere before starting our advanced portfolio, we had used it in previous stages. During the pre-production stage it had helped us to complete our animatic, in which we followed a structure and added our own shots in. Additionally, when making videos for costume and makeup, Emily used Adobe Premiere to speed up the footage she had taken. Vanita had also used Adobe Premiere when editing her camera techniques video. |
sequence timeline |
tool box |

The sequence timeline is an overview of all the different footage and sound that are present. Different shots can be manipulated in different ways since we were able to change the speed of a clip as well as add different transitions. By using the drag scroll located at the bottom of the sequence timeline, we were able to move along the timeline and focus on different sections.
canvas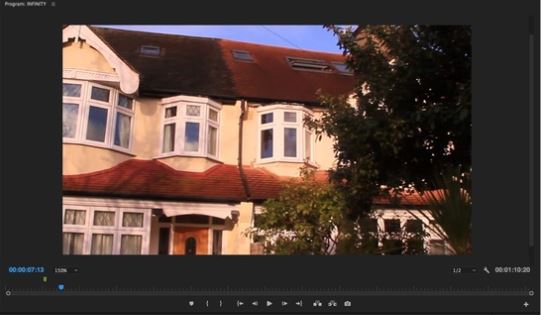
The canvas allows you to see what you have just edited. It allows the user to see whether or not they are happy with the work they have done. This is useful since before exporting the trailer, we were able to watch our trailer and make any finishing touches to it.
|

The tool box found on Adobe Premiere is like the one found on Adobe Photoshop. These tools were used for all shots since we selected the clip we want and then cut it using the razor tool. This is because in most cases the shots we had taken were too long or included footage that was not needed. The blade tool was also used to create two clips from one, in which was used for the jump scare in our trailer.
project panel
The project panel shows an overview of all the footage that has been imported into Adobe Premiere. It also shows the different captions and sounds that have been imported, which can easily be dragged onto the sequence timeline so it can be edited.
|
how to add a caption

|
To add a caption the first step is to click the 'New Title' option under the 'Title' tab at the top. From there we picked the option of 'Default Still' in which led to the creation of preferences in to which we clicked 'OK'. A new window was created in which presented us with a blank title card in which would be used for a caption. The caption we decided to make was the title, so we picked a font that we had already downloaded and installed: Virus 01. We clicked the text tool and then typed out the title of our film: Uploaded. When we were finished the caption had saved into the project panel among our other shots. From there we dragged the caption onto the timeline in which meant we could then adjust it. |
how to export a video

|
To export a video from Adobe Premiere the first step is to click 'File' and then click 'Export'. From this we were able to choose what we exported, in this instance we would be exporting media. After clicking on 'Media' we were able to change the name of the media to 'Uploaded teaser trailer' by clicking 'Input name' and changing it. From there we clicked export and waited a few minutes for the file to be exported to our desktop. We then went onto YouTube and uploaded the file by clicking 'Select files to upload'. After YouTube had finished uploading and processing it, we were then given the link for the trailer. This meaning it could be easily distributed and shared among our target audience. |
how to add transitions

|
Adding transitions was important for our trailer since it meant an easy transition from one shot to the next. To add a transition we had to click 'Effects', which is located next to the project panel. From there we had a range of different effects and transitions that we could pick from. Since we wanted to add a transition we clicked on 'Video Transitions'. When we picked the transition we wanted we simply dragged it between the two clips we wanted the transition to be on. |
sound

|
When choosing sound for our trailer, we had a range of sounds that had either been downloaded to our Mac or sounds that we had downloaded from YouTube. We used sound to represent the equilibrium and the disequilibrium: using slow and upbeat sounds for the equilibrium and then moving to fast paced and sharp sounds. We had to find specific sounds for some parts of our trailer such as the computer becoming glitched.
|
|
YouTube was useful when finding specific sounds since there are a variety of different sounds that we could choose from. We used YouTube to find sounds such as a glitch effect as well as the sound for our establishing shot.

|
YouTube mp3 was used when we wanted to convert a sound we had found on YouTube into a sound format. From there, we were then able to drag this into Adobe Premiere where we could adjust and edit it.

|
different sound effects
Below are the sounds that we used in our animatic and trailer, which were inspired by the Deliver Us from Evil trailer. These were effective in terms of creating tension and gave us a structure as to what our trailer should follow.
|
|
|
|
| ||||||||||
|
Deliver Us From Evil trailer
This was the trailer given to us as a template. We had to follow the speed of the shots as well as the sound used in the trailer.
|
Uploaded animatic with sound
This was the animatic that James made by adding the shots from our drawn storyboard onto the sound and structure for the Deliver Us From Evil Trailer.
|
Uploaded teaser trailer
This is the final trailer which combines actual shots and sound to make a completed teaser trailer.
|

In conclusion, the use of media technologies throughout all stages of our work: research, planning, construction and evaluation stages has aided us and benefited us. By using the Internet and all of the websites on it, such as IMDb and Google, we were able to do a vast amount of research into the horror genre and on real media texts. Websites such as YouTube and Weebly also allowed us to display our work and make it easily accessible. Using technologies such as the different cameras and camera equipment developed our practical skills as well as developing our knowledge on these. The Mac was also an efficient piece of technology since on these we were able to create and save our work throughout all stages of our coursework. Using Adobe Photoshop and Premiere has taught us how to use different effects and how to make a successful product since our final products clearly relate to the horror genre. Overall, our individual skills have developed as well as our skills as team due to the range of media technologies that we used throughout the project to present our work.
